In this tutorial you will learn How To Schedule Automatic Shut Down in Windows 10.
To Schedule automatic shutdown in Windows 10 you can use the Windows Task scheduler to create a Shutdown task or schedule an auto shutdown using the Run dialog box and specifying the command “shutdown -s -t <number in seconds>“
You can also use the Command Prompt and schedule an auto shutdown using the command “shutdown -s -t <number in seconds>“
How To Schedule Automatic Shutdown in Windows 10 : Step by Step Guide
Here are the methods to Schedule Automatic Shutdown in Windows 10
Option A : # Automatic Shutdown using Task Scheduler
Enclosed are the steps :
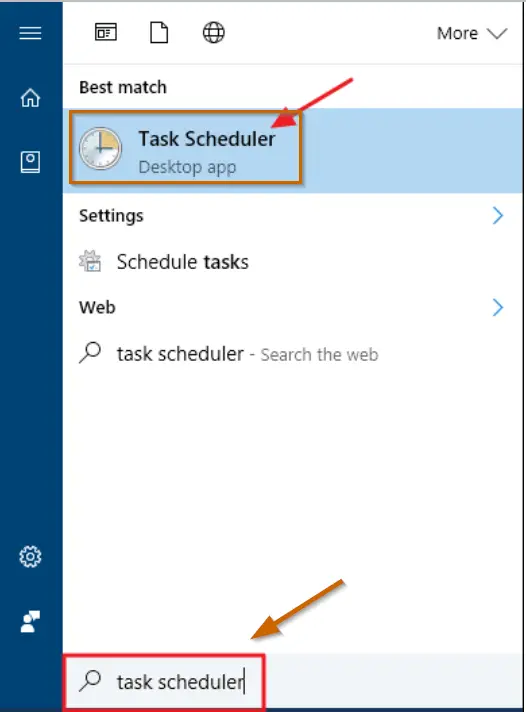
Step 1 : Search for Task Scheduler on the Windows search bar
Navigate to Windows search bar beside Windows Start menu and type “task scheduler ” in the search box.
You can also use the keyboard Shortcut Windows+Q key to pop-up the search bar.
Step 2 : Select “Create Basic task” option
Step 3 : Specify a name to the task
On the Create basic task wizard Specify a name to the task for example Auto Shutdown and then click the next button
Step 4 : Choose when you would like your task to start
Under the question “when do you want the task to start ?” select from the available options such as daily ,monthly weekly etc as per your requirement.
Step 5 : Specify the Start date and time and Click on the Next button
Step 6 : Select an action for your task
Choose the option “Start a program” from the available list of options under the questions “What action do you want the task to perform”
Step 7 : Select the Shutdown Program exe
Browser and find the shutdown.exe under C:\Windows\System32
Step 8 : Add argument
Specify “-s” as an argument and then click on Next.
Step 9 : Finish the Wizard
Now click on the finish button to complete the task creation.
Option B : # Schedule Automatic Shutdown using Run
Enclosed are the steps to schedule auto shutodown using Run dialog
Step 1 : Start the Run dialog box
- Start the RUN dialog box by using the keyboard shortcut Windows key plus R(Win+R) .
- You can also search for Run app by typing Run in the Windows Search bar beside the Windows start icon and Click on the best match result.
Step 2 : Type “shutdown -s -t <number in seconds>” on Run dailog box
Here number of seconds specifies the duration after which you want your system to shutdown.
As an example if you want your computer to shutdown after 20 minutes you can type “shutdown -s -t 1200”
Set the number of seconds as per your requirment and Click on OK
Option C : # Schedule Auto Shutdown using Command Prompt
Enclosed are the steps to Schedule auto shutdown using CMD
Step 1 : Start the Command Prompt.
- Start the Command prompt either by searching CMD in the Windows Search bar and then clicking on the Command prompt from the search result.
- Alternatively use the keyboard Shortcut press Win+R key and then type cmd in the Run dialog box .Now press enter or click OK
Step 2 : Type “shutdown -s -t <number in seconds>” on the Command prompt.
As an example if you want your computer to shutdown after 30 minutes you can type “shutdown -s -t 1800”
Step 3 : Press Enter
Once you press enter your PC will automatically shutdown after 30 minutes.
How To Schedule Automatic Shutdown in Windows 10(Conclusion)
In the preceding tutorial we have shown you 3 easy methods using which you can schedule automatic shutdown in Windows 10 or 11.
We hops this tutorial on How To Schedule Automatic Shut Down in Windows 10 was helpful.
Related articles :
How to Uninstall a Program using command prompt on Windows 10( Quick & Easy Guide )
How to Open Command Prompt on Windows 10/11 ( Easy Guide )
How To Start System Restore From Command Prompt ( Easy Guide )
How to Change Directory in Command prompt CMD in Windows 10 & 11(Quick & Easy Guide )
